

It’s a necessity to ensure the safety of your critical accounting information when you grant employees access to QuickBooks. You trust your staff members, or you wouldn’t have hired them. But it’s just good business practice to protect your financial data as much as you can. After all, your company file contains details about your customers’ and vendors’ businesses that you must keep confidential.
QuickBooks contains built-in tools for assigning user permissions to employees. Here’s how it works.
Setting Up Users
You’ll start by opening the Company menu and selecting Set Up Users and Passwords | Set Up Users. The User List window opens. You should see yourself listed as Admin. Click Add User. The window pictured below will open.
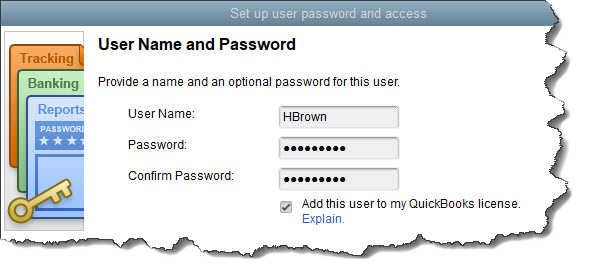
TIP: If you don’t know how many licenses you have, click F2 and look in the upper left corner. If you need to add a user to your QuickBooks license, go to Help | Manage My License | Buy Additional User License.
Enter a User Name and Password for your new user, then click Next to see what this individual’s access options are. You can choose from:
- All areas of QuickBooks,
- Selected areas of QuickBooks (which will appear in the next window), or
- External Accountant (access to all areas of QuickBooks except sensitive customer data, such as credit card numbers).
Click the button in front of Selected areas of QuickBooks, then click Next.
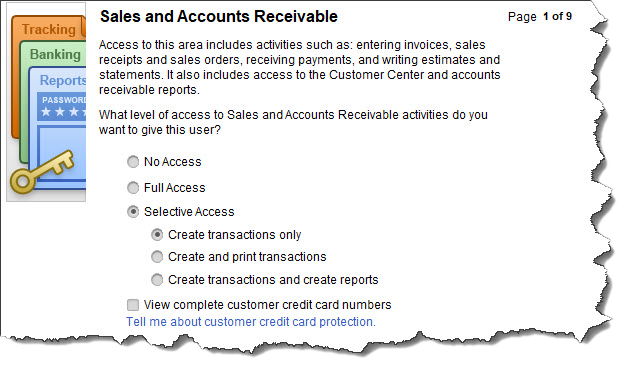
As you can see, you have three options here: No Access, Full Access and Selective Access. If you go with Selected Access, indicate what the limitations are here. You’ll also have to decide whether this employee will be able to see complete customer credit card numbers.
WARNING: It goes without saying that you should consider two of these options very carefully. Generally, you as the Admin should be the only person who has Full Access and who can view complete customer credit card numbers. You should grant these permissions to an employee only if you trust the individual as much as you trust yourself. Even then, you should do some auditing.
Click Next when you’re done here. You’ll have to make similar decisions over the next several windows, which divide QuickBooks into multiple task types: Purchases and Accounts Payable, Checking and Credit Cards, Inventory, and Payroll and Employees. The two windows after them will again require a lot of consideration and caution. They are:
- Sensitive Accounting Activities. This refers to activities like transferring funds between accounts and doing online banking.
- Sensitive Financial Reporting. What kind of access do you want to grant this user to financial reports? Your selection here will override other reporting restrictions placed on the user.
Here again, you can choose between No, Full and Selective Access.
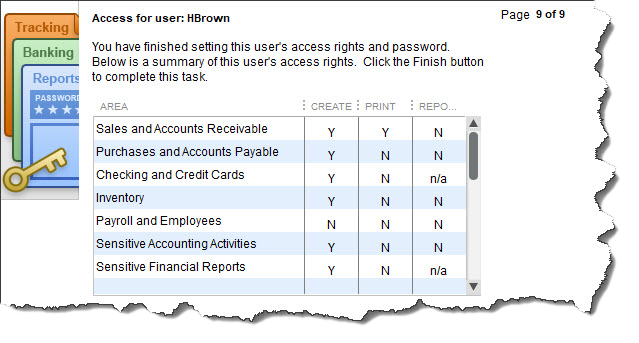
Finally, you’ll have to specify whether this employee can change or delete transactions in their areas. Will they be allowed to do so to transactions that were recorded before the closing date? When you click Next after completing this window, you’ll come to a summary of the access and activity rights given to this employee. Check this table carefully, then click Finish.
You can get to your User List at any time, where you can Add, Edit, Delete and View users by going to Company | Set Up Users and Passwords | Set Up Users.
Critical Decisions
Allowing employees to access your QuickBooks company file is a big decision. Determining just how much access they’ll have deserves equal consideration. But if you simply don’t have time anymore to do your accounting tasks or you just want to spend more time away from it so you can work on growing your business, granting QuickBooks access to one or more employees may be a necessity.
We’re sure you noticed earlier that you can give your accountant limited access to your QuickBooks company file. So there’s another option if you don’t want to bring an employee in. If you’re interested, please contact the office to find ways to lighten your load.